
A contractor provides services toward contract assignments for clients. Once created, contractors can be assigned to contract assignments, as well as create and submit timecards and expenses for approval.
From the Navigation, click New then select Contractor.
The Contractor profile then appears.

In the Personal Information section, fill in the relevant information for the contractor. The following fields are required.

Required fields:
- First Name
- Last Name
- State
If the contractor is a 1099 contractor click the check box next to 1099 Contractor and then fill in the Company Name field.

If you would like the contractor to be able to log in, select Active. The Registered box will automatically be checked to indicate that the contractor has created a password.
Enter any applicable information in the Check Delivery, State Taxes, or Federal Taxes sections. Information in these sections is not required.

Custom Fields associated with the contractor will appear at the bottom left of the profile. Enter any information associated with the custom contractor fields.

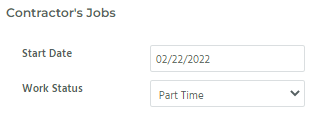
If the contractor is associated with a contract assignment, you can enter Start Date and Work Status from the Contractor Profile
In the Contractor’s Benefits section, you can indicate whether or not the contractor is eligible for health insurance. If they are, click the check box next to enable Enable Health Insurance. Other relevant fields will then appear which will allow you to enter the information for the contractor’s health insurance.

Each selection will enable additional fields in each category.
You can finalize the creation of the contractor by selecting either Create or Save and Create Contract Job at the top right of the New Contractor page.

- Select Create if you would like to save the information for the contractor
- Select Save and Create Job to prepopulate the information into the contract assignment with information entered for the current new contractor.