This article covers how to filter, search, and select records on the Create Invoice page, how to create invoices, and how to view your invoice history.
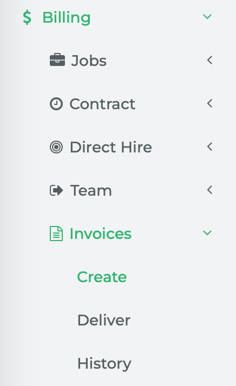
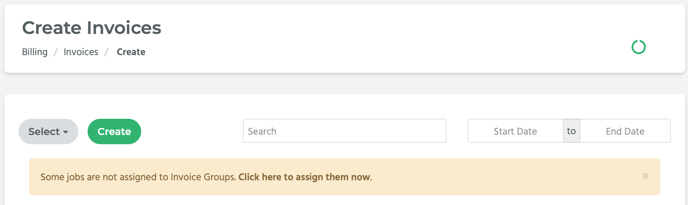
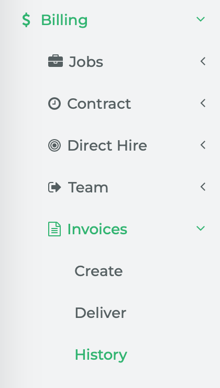
From Main Navigation, go to Billing > Invoices > Create.
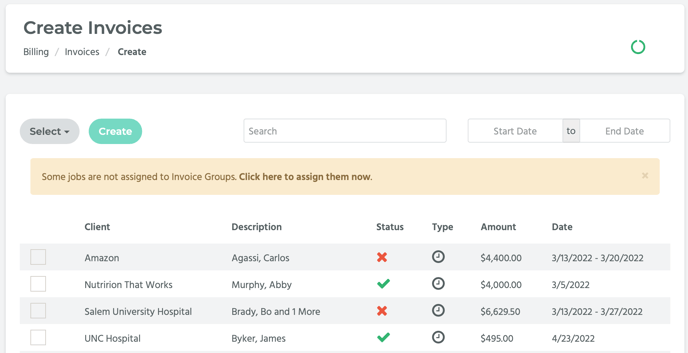
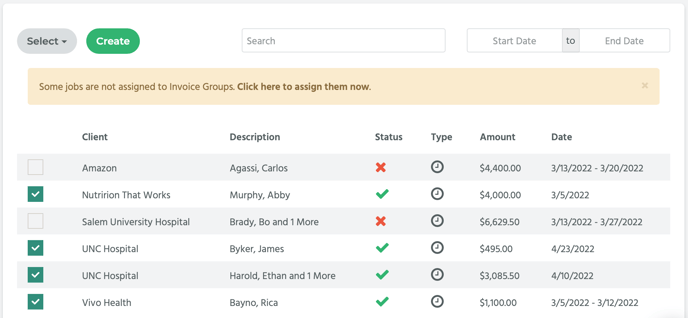
The Create Invoices page shows all of the timecards that have a status of Approved. The table on the Create Invoices page has several columns: Client, Description, Status, Type, Amount, and Date.
📎 NOTE
Client is the name of the client company.
Description has the name or names of the contractors or direct hires that worked.
Status has a value of either Ready (represented by a green ‘✓’) or Not Ready (represented by a red ‘X’).
- A status of Ready means that all of the timecards associated with the jobs in the invoice group have been approved and the invoice is ready to be created.
- A status of Not Ready means that Bilflo recognizes that all of the jobs/timecards that are associated with the invoice group have not been approved yet. You can still create an invoice while the status is "Not Ready" but this serves as a visual reminder that there could be some additional follow up needed in order to create the invoice.
Type is the service offering (i.e. Contract or Direct Hire).
Amount is the invoice total, in other words, the amount that will be billed to the client.
Date is the timecard's Period End Date or Dates.
How to Manually Select Timecards
Each record has a checkbox, the name of a client/company, the contractor’s or direct hire’s name (located under Description), the status, the amount that will be billed to the client, and the timecard’s Period End Date or Period End Date range.
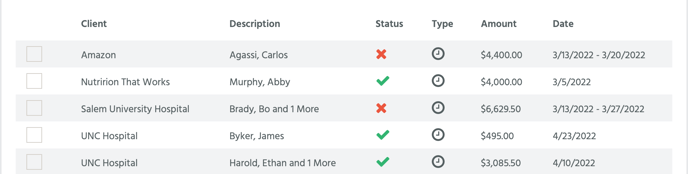
To select a record, click on its checkbox.
How to Select Multiple Timecards
You can select records based on whether their status is Ready or Not Ready; whether the Type value is Contract, Direct Hire, or Team. You can also select All or None of the records.
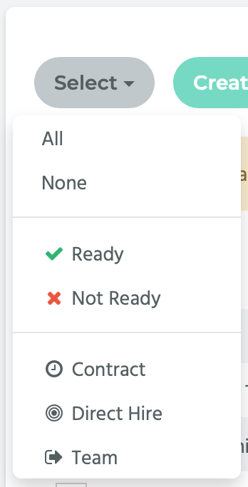
Click on the Select button located on the top left hand side of the page. A drop-down menu will appear with the following options: All, None, Ready, Not Ready, Contract, Direct Hire, and Team. Select the option you want, and the records meeting that specification (i.e. their status is Ready or Not Ready, or their Type value is Contract, Direct Hire, or Team, etc.) will be selected.
Example:
After clicking on the Select button, Ready was selected. All of the records with a status of Ready (represented by a green ‘✓’) have been selected.
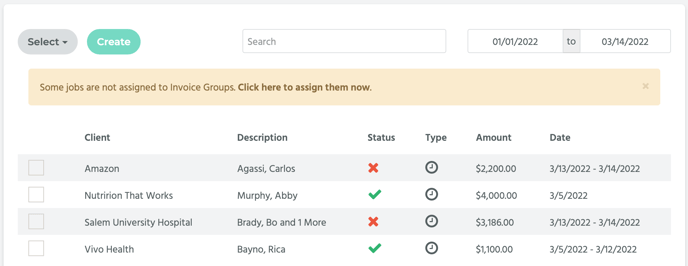
How to Filter by Date
At the top of the page are two date fields, Start Date and End Date. In the first field, enter a start date and in the second field enter an end date. Hit enter.
NOTE: You can enter just a start date if you want to view all records starting from [start date]. Similarly, you can enter just an end date if you want to view all records prior to [end date].
This will filter the records shown on the page to only those with a Period End Date value that falls between the two dates you entered.
Choose a record and click on the value under the Amount column.

This will take you to a preview of the invoice. Note that the only records displayed are those with a Period End Date falling within the date range you entered.
How to Filter by Search Box
In the Search box at the top of the page, enter either a contractor, direct hire, team, or client name. Hit enter.
Now the page will only display records with that contractor, direct hire, team, or client name.
NOTE: You can use both the date field and Search box together to refine your filtering.
How to Create Invoices
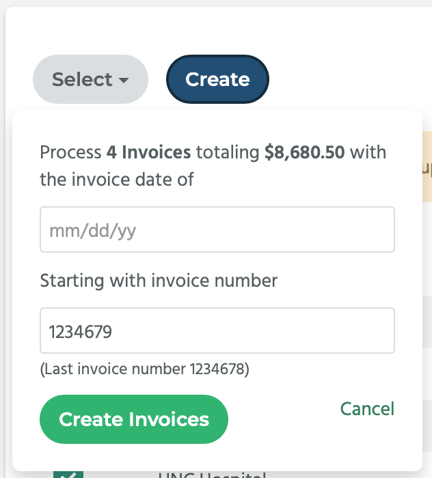
After you have selected the record or records you wish to create invoices for, click on the Create button located on the top left hand side of the page. A pop-up window will appear. It will tell you how many invoices are going to be processed and the total monetary amount of all of the invoices.The first invoice will have the invoice number displayed and any subsequent invoice created will have the next chronological number.
It will also have a field where you can enter the invoice date (which will likely be the current date). Enter the date into the available field. Then click on the Create Invoices button. A notification saying, “Success!” will appear on the top right hand side of the screen and the page will refresh so you can see which records have not yet been created.
NOTE: The records you selected and created invoices for are no longer listed on the Create Invoices page.
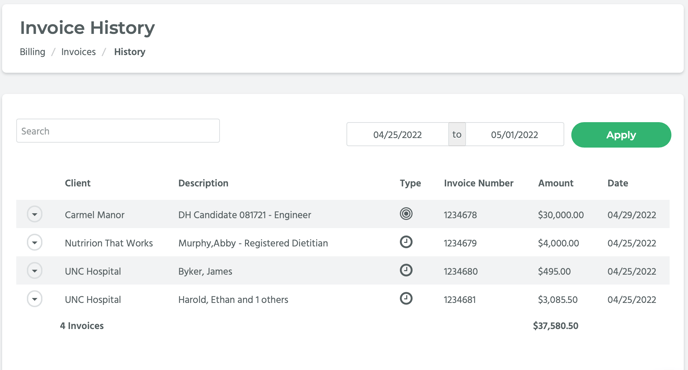
How to View Your Invoice History
From the Main Navigation, go to Billing > Invoices > History.
The Invoices History page displays invoices that have been created. The invoices you just created will be listed here.